
How To Edit Text Anywhere On Your Website
Not sure how to edit text in a specific area of your website? It's as simple as hovering your cursor and finding the edit pencil icon! Check out the video and content below for more details!
By default, your ChurchSpring site auto-populates certain areas to save you time and hassle! Once you log in to your trial website, you will be able to update the template with your church name, address, and phone number–just to name a few of the areas.
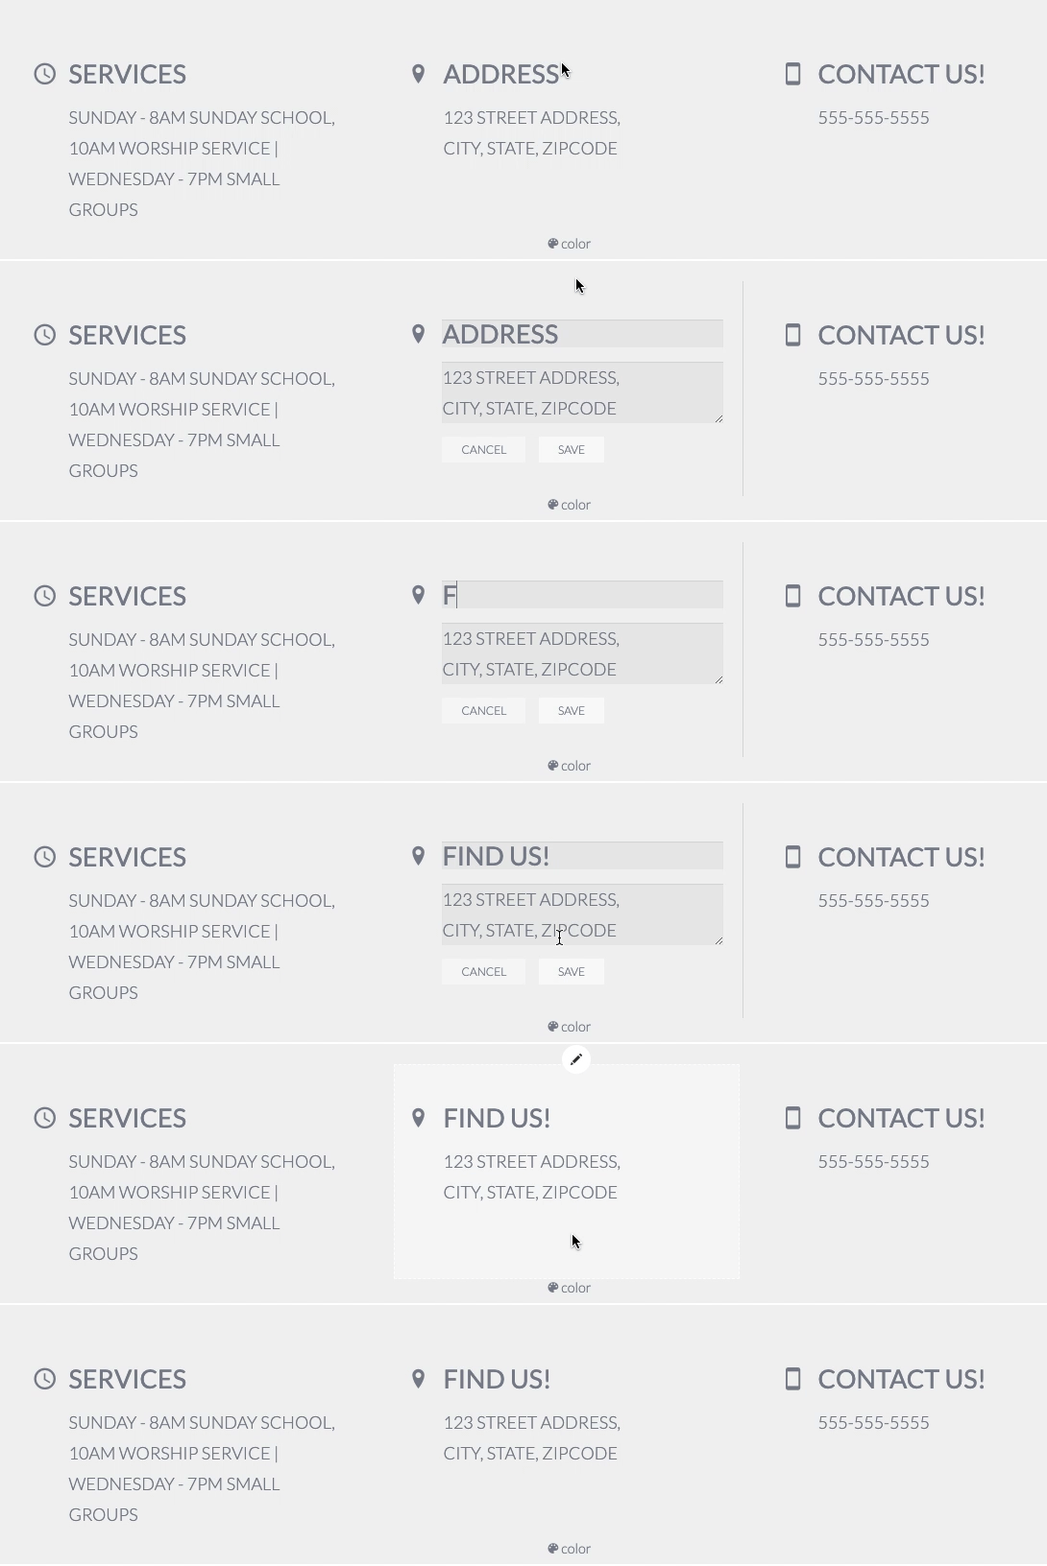
Follow these steps to use the "Edit Anywhere" feature so you can create a truly customized site!
- Step 1: Navigate to a page with text that you want to edit.
- Step 2: Place your mouse over the text area that you want to edit until you see the Pencil icon—Whenever you see the pencil icon, you can edit that text! Click the Pencil icon to edit.
- Step 3: Update the new text that you want and hit ‘Save.’
Additional Places You Can Update...
- Customize your website footer within these system guidelines. Even though the footer columns are system-generated, you have some flexibility to edit the titles.

- Change the Give Button Text: Edit the button text of your Give button in the top right corner! Remember to hit the Save icon to save your update.
- Customize your Navigation Bar Page Titles: Update your home page navigation and sub-navigation page titles to reflect your ministry style. The default of “Events” could be changed to "Calendar," or “Updates” could be changed to "Blog." When hovering over your title, you'll see two icons pop up. Select the "pencil" to make changes, then select the "disc" icon to save! NOTE: This change will affect the actual page title as well!

 Edit the icons on your services bar
- Click to edit the section in which the icon is located
- Place your mouse over the icon and a window with other icons will appear
- Select the new icon
- Hit Save!
If you need additional help, reach out to the support team at support@churchspring.com.